
3D Engine Module Documentation
Download the module
Please click here  to download version 1.0.0 of the 3D Engine module.
What's the 3D Engine module ?
The 3D Engine module is an Ignition module embedding a web SDK to interact with 3D models.
It permits an increased manipulation of your 3D models using a perspective component.
Here is a non-exhaustive list of features :
- Visualize a 3D model,
- Move manually or via script in the model,
- Interact with the different entities, (Selection, Hide entity, XRay)
- Retrieve the ID of a selected entity,
- Customize an entity using Ignition Style,
- Create visible annotations on the model to display the desired information, (Binding, tag..)
- Blinking entities on alarm triggers...
You can try it right now here !
The required model format is XKT.
Convert your model to XKT format
The XKT format compresses large double-precision models to a compact payload that loads quickly over the Web.
The best way to get a correct xkt file is to use the xeokit-convert tool.
Preferably use a realese version such as 1.0.9.
The file types compatible with the converter are gltf, ifc, laz, las, pcd, ply, stl and cityjson.
To do this, you need to download the converter from github or install the command via npm.
The following options are available :
Here is an example of an IFC to XKT file conversion.
Import an xkt model into the component
This solution is not conventional in Ignition.
The files are not saved in the gateway and therefore not redundant by Ignition.
The ideal solution is to use a folder mounted with the webdev module.
First, you will have to store the model on your ignition server.
To do, this you can create a models folder on the ignition webserver and put your files there.
Windows : (C:\Program Files\Inductive Automation\Ignition-windows-x86-64-8.1.16)\webserver\webapps\main\models\yourfile.xkt
Unix : /usr/local/ignition/webserver/webapps/models/yourFile.xkt
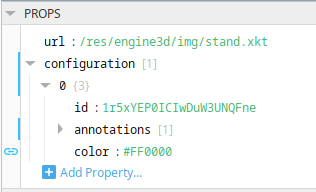
Now you can import your models from your 3D Engine component by filling in the "url" property as follows "/models/yourfile.xkt".
Press run (F5) to begin loading the model in the designer.
Create annotations
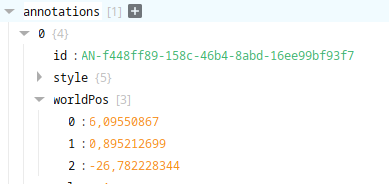
An annotation is a visible bullet in your model wich can display data.
It is always dependent of an entity.
You can use links to populate its value or customize it using Ignition Style.
The properties of an annotation :
- id, its identifier in the model, (String, AN-XXX)
- worldPos, its position in the model, (Number[], [x,y,z])
- value, the visible value,
- style.
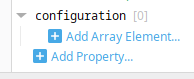
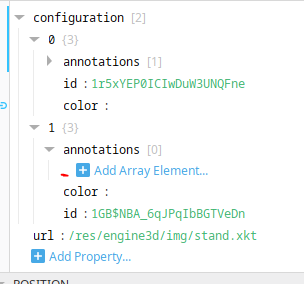
First, to create an annotation you must instantiate the associated entity in the configuration property of the component.
Instantiate an entity
There are two ways to do this :
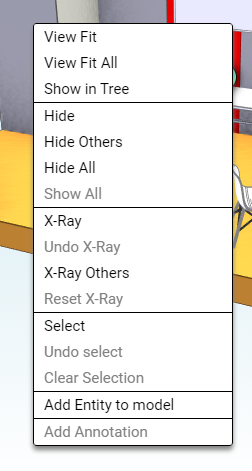
- From the Designer, go to runtime (F5), right click on the desired entity, click on “Add Entity to model”,
- You will notice that the configuration props is now composed of an item with the Id of your entity. Or
- From the designer, click on + in the configuration props of your component,
- Fill in the id with the id of the desired entity.
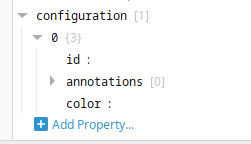
You can customize the color of an entity with the property color.
Create an annotation
Then, on the same principle you can create annotations in order to display values on your model :
- From the Designer, go to runtime (F5), right click on the desired entity, click on “Add annotation”.
- From the designer, click on + in the annotations props of your entity,
- Fill the id with “AN-” + the id of the desired entity,
- Fill in the worldPos.

Or
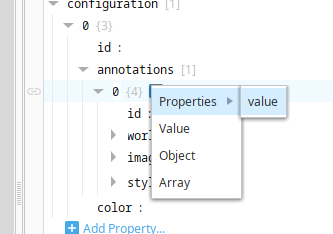
Set the value
Once your annotation is declared :
- Add the value property to the annotation object,
- Create a Binding on this value.
You can customize the background of your annotation with the following style : background : linear-gradient(222deg, #6628e0 0%, #82ffd7 74%)
Scripts and events
flyTo function
This function permits to move around the 3D model using a script.
You can retrieve the position of your camera (eye, look, up) using the "onSelectEntity" event.
onSelectEntity event
The onSelectEntity event permits to retrieve information about your model during its operation when an entity is selected.
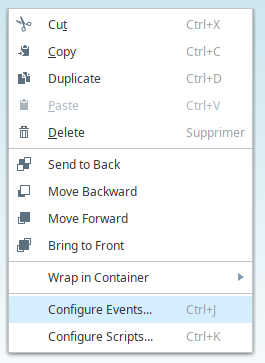
You can access the events configuration by right-clicking on your component and selecting "Configure events..." (Ctrl+J)
The event permits to retrieve the id of the selected entity, her world position as well as the information related to the camera (eye, look, up) at the time of the selection.
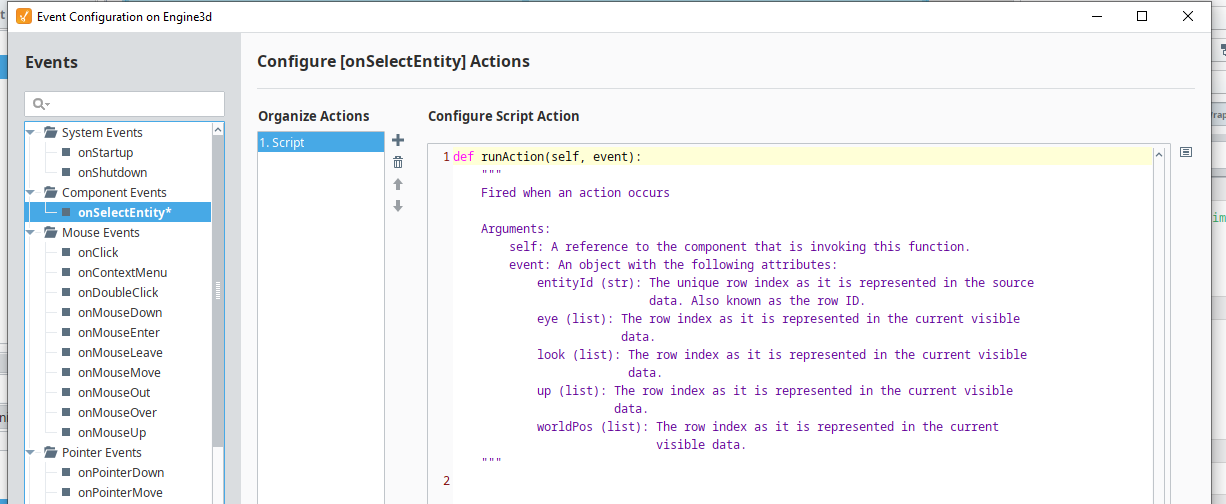
You can store the camera information in a custom property for use with the flyTo script function.
You can use the entityId to find entity in the configuration and change its value or color.
Changelog
- 1.0.0 :
- first commercial release